Two moms. Five daughters. Opposite ends of the globe.


Two moms. Five daughters. A friendship that spans opposite ends of the globe.


We have been best friends for ages with a shared love for good food. A desire of good health for ourselves and our families have lead us to exploring the paleo lifestyle together. Enjoy our adventure!


Sunday, November 27, 2011

Massaman Beef Curry

Just when I thought I couldn't make a better curry...

In one of my earliest posts, I shared how to make a perfect Thai Coconut Curry, but I think I've actually out-curried myself. On this day, I tossed some meat and veggies into the slow cooker in the morning without really knowing what I was going to make for dinner. Coming home to a house filled with smells of a gingery-stew was lovely, but I just wasn't in the mood to eat it as-is. In 15-minutes, I whipped that "plain" stew into the best Massaman curry I've ever had!


Ingredients:
  • 2 pounds stew meat, cubed
  • 1 onion, cut into eighths
  • 2-3 carrots, cut into large chunks
  • 1-2 turnips, cut into large chunks
  • 1-2 inch piece of ginger, sliced
  • 1 cup beef broth
  • 1/2 tsp Berbere spice or cayenne (optional)
  • 1 T coconut oil
  • 2-4 T Massaman curry paste 
  • 1 can coconut milk
  • 2 tsp coconut aminos (or wheat-free tamari) 
  • 1/4 cup cashews (optional)

Directions:
  1. Add meat, onion, carrots, turnips, ginger, and beef broth to slow cooker. Sprinkle with Berbere spice or cayenne, if using.
  2. Cook stew on low for 4-6 hours, or until meat is cooked through and tender.
  3. Heat oil in a wok or pan over medium-high heat.
  4. Add curry paste and fry for 2-3 minutes. The paste will become fragrant and may begin popping and sizzling.
  5. Add about 1/3 can of coconut milk and mix well with the curry paste and oil. Fry for 5-10 minutes or until an oily sheen appears the coconut milks begins to separate.
  6. Add the remaining 2/3 can of coconut milk along with the coconut aminos.
  7. Add contents of slow cooker into the curry sauce, including the liquid. Cook 5 minutes, or until the sauce thickens.
  8. Taste and adjust. Too mild? Add more curry paste. Too bland? Add more coconut aminos. Too thick? Add a little water. Continue adjusting until you reach that taste of ultimate yumminess.
  9. Serve immediately.
Note: The store bought Massaman curry paste tends to be much  more mild than the other pastes I buy. I usually have to double the amount of paste to get the level of flavor I like. I don't generally use fish sauce or lime juice in Massaman curry, but you can certainly add those ingredients instead of the coconut aminos if you like.

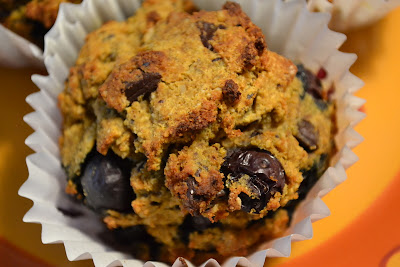
Pumpkin-Berry Muffins

Sunshine was up early this morning playfully "complaining" that she had a sweet tooth. Since she has taken such an interest in cooking lately (and because I was attempting to complete a work project on the computer), I told her she should make muffins. Her instructions were to get all the ingredients out that she wanted for the muffins then to come get me for help putting it all together. Not five minutes later, I was called into the kitchen and met with a grinning nine-year old pointing to a countertop with pumpkin, blueberries, walnuts, and a chocolate bar.

These monstrously delicious muffins are the result!


Yield: 18 muffins

Ingredients:
  • 1 cup almond meal/flour
  • 1/4 cup hazelnut meal (or almond meal/flour)
  • 3/4 cup coconut flour
  • 2 T flax meal
  • 1 T flax seeds
  • 2 tsp pumpkin pie spice
  • 1 tsp baking soda
  • 1/2 tsp nutmeg
  • 1/2 tsp powdered ginger
  • 1/2 tsp salt
  • 1 cup pumpkin puree
  • 5 eggs
  • 1/4 cup coconut oil
  • 1/4 cup agave or honey (optional)
  • 1 cup walnuts, chopped
  • 1 cup blueberries
  • 1/3 dark chocolate bar (I prefer Green & Black's 85%), chopped (optional)

Directions:

  1. Preheat oven to 350 degrees F.
  2. Grease or line muffin trays.
  3. In a large bowl, mix the meals/flours, flax seeds, baking soda, spices, and salt.
  4. In a second bowl, mix the eggs, oil, and sweetner, if using.
  5. Pour the wet ingredients into the dry ingredients and mix until all the flour is moistened. The mixture will be thick and a bit crumbly.
  6. Add the nuts, berries, and chocolate, if using. Stir gently until the extras are mixed in but being careful not to smash the blueberries.
  7. Fill muffin cups with batter (all the way as this mixture doesn't rise much).
  8. Bake for 25 minutes.
Note: I think you could easily turn these into cookies by shaping dough into small balls or discs and placing on cookie sheet.

Thursday, November 24, 2011

No Guilt Here

Thanksgiving is traditionally a day of overindulgence and guilt. Not here. Not this year. And for that I'm thankful. Since this is our first paleo Thanksgiving, I was super excited to try and "primal-ize" some favorite traditional dishes. I began researching recipes several weeks ago and found some fabulous suggestions for green bean casserole, sweet potato pie, and even almond meal stuffing. My mouth was watering from all the finds and I think that evening dinner was not eaten until the kids' bedtime due to my reckless recipe surfing. However, somewhere between that night and the night I made my Thanksgiving shopping list, my motivation to try several new recipes all at once waned. Hard. I realized that over the past few years, we had already dropped some of those less healthy dishes from our holiday dinner table. Why re-introduce green bean casserole, even paleo-ized, if we didn't seem to miss it last year? Plus, my spouse offered to cook. Do not look a gift turkey in the mouth.


We ended up with a lovely spread. A beautiful bird, roasted to near perfection. Minty peas (peas, mint, vinegar, a touch of agave). Mashed "sweetnip" (sweet potato, turnip, a little butter, salt, pepper). And my gorgeous sausage stuffing. I was just winging it and can say I WILL be making this again. I thought it was divine and I swear I didn't miss the dense bready stuffing I normally love.

Sausage Stuffing Ingredients:
  • 1 T coconut oil
  • 1/2 large sweet onion, finely chopped
  • 1 large carrot, chopped
  • 2 stalks celery, chopped
  • 1 pound ground pork
  • 1/2 to 1 tsp sage
  • 1/2 tsp Berbere spice
  • 2 apples with skins, cored
  • salt and pepper, to season

Directions:
  1. Roast the apples. We actually cooked them inside the turkey and so they nearly disintegrated in lovely turkey drippings. You might achieve the same consistency and flavor in a slow cooker or roasted in the oven with some bacon grease. In a pinch, you might be able to substitute unsweetened applesauce.
  2. Heat the oil over medium heat. Fry the onion, carrot, and celery until they begin to soften. Remove from pan and set aside.
  3. Fry the pork. When partially cooked, stir in the spices. Continue until pork is cooked through.
  4. Return the cooked vegetables and cooked apples to the pan. Stir into the pork and continue cooking until vegetables reach desired doneness.
  5. Serve immediately.
Note: This dish did not taste nearly appealing once it cooled down. Definitely reheat any leftovers!

Sunday, November 13, 2011

Roasted Winter Squash Soup

I love soup. Anytime of year, but especially thick, warming soups in winter. Before moving to a paleo diet, my favorite soup ingredients often included pasta or beans. Since cold weather has set in, I've enjoyed experimenting with new recipes sans the ingredients I'm trying to avoid. I've had a couple delicious winter squash soups before, but some reason, have never attempted it at home. Now that I'm a serious squash lover, I just had to come up with an easy squash soup. And I am NOT complaining about the results!


For this soup, I wanted a sweet taste and smooth texture. I chose Blue Kuri squash with bright orange flesh. I also had a Delcata squash that needed eaten, so I added that as well. I think this soup base would work just fine for any winter squash. I'll be experimenting... and there's plenty more winter left in Alaska to do just that!

Ingredients:
  • 1 blue kuri and 1 delcata squash (substitute as desired)
  • olive oil
  • fresh ground pepper
  • 2 T coconut oil
  • 1 sweet onion, finely chopped
  • 1 cup chicken broth
  • 1 cup coconut milk

Directions:

  1. Preheat the oven to 450 degrees.
  2. Cut the squash and remove seeds.
  3. Drizzle squash with olive oil and sprinkle generously with fresh ground pepper.
  4. Bake for 45 minutes.
  5. Let cool.
  6. Heat coconut oil in a pan.
  7. Fry onion on low-medium heat until golden brown and carmelized.
  8. Scoop flesh from squash and place in blender with fried onion, chicken broth, and coconut milk.
  9. Blend until smooth. Add water until desired consistency is reached.
  10. Return to stovetop and heat.
Note: The squash can be baked a day ot two before making the soup. I cooked it the previous night while cooking dinner.

Tuesday, October 25, 2011

Scotch Eggs


I have no idea what reminded me of these. I had one a dozen or so years ago when I was in England... But WOW-- how perfect for paleo? Well, minus the breadcrumb crust. So, in my experimentation I fried them without any coating, and then the last few I did roll in egg then some gluten-free crumbs. I liked the crumb coating, and considering a few tablespoons of gluten free crumbs was it for the day it was well within the 80/10 guideline I try to follow. I also tried deep frying only, versus a few minutes of deep frying followed by about 8-10 minutes in a medium oven. These could easily be baked in oven without any deep-frying, or made into a meat loaf... but having the meaty grenade shape is fun and makes them super easy to grab on the go or stuff in your lunch bag. They're good hot with a salad, or just as good -if not better- cold the net day.

Scotch Eggs

6 boiled eggs, peeled and set aside.

1 medium onion
2 cloves of garlic
S&P
(any and/or all of the following)
1 or more fresh chili pepper - with or without seeds, your choice.
1/2 red pepper... (I did this for the kids, then added the hot chili and spices after I made theirs.)
fresh or dried herbs... at least 2-3 Tablespoons total fresh, or at least 2-3 teaspoons total of dried. I used dried sage, mixed italian herb blend, red pepper flakes, and cayenne.
1 raw egg
1 pound ground meat--- beef or pork (or emu, lamb, deer...doesn't really matter.)

**even easier - do you have a paleo sausage you love? Use a pound of that - or any sausage recipe you like**

1. Peel the onion and garlic and toss in the food processor with the S&P, and herbs and spices. Whirl until the onion and garlic are pretty small chunks...
2. Add the ground meat and egg and process until pretty smooth - this makes it easier to form around the egg and it stays together in the deep fryer.

3. Divide the mixture into 6 portions. (approx 1/2 cup each.)

4. Flatten one portion of meat out in your hand, and place 1 hard boiled egg in the middle...carefully form the meat around the egg making sure to seal all seams. Set aside and repeat with the next 5 eggs.

If you like - at this point you can either dust them with some gluten free flour, or roll in a beaten egg followed by anything you've used for a paleo breading . (almond meal, ground pork rinds) Or not!

5. Heat oil in a deep fryer and deep fry one at a time approx 5-6 minutes. OR Fry them like meatballs in a shallow pan until browned completely all around and pop them in a medium oven for 10 minutes or so to finish... or really, any way you'd like to cook them works. You may have to experiment. The first one I deep fried with no coating for 8-9 minutes. Recipes I found on the web said to deep fry them for 10 minutes but that was too long, and the oil was about 325 - 350F. The best ones I made were deep fried for about 2 minutes @ 350F, then finished in a 350 oven for not quite 10 minutes...and they were even better for breakfast the next day.

Saturday, October 15, 2011

Tangy Mango Chutney

In my opinion, no Indian meal is complete without chutney. Thank goodness chutney is not always the uber sugary type presumably made popular by Major Grey in the 19th century. Chutney is similar to "curry" in that it's a generic word used in South Asian cuisine. Chutney is simply a condiment, usually classified as either sweet or hot (and often both) that contains any combination of fruit, vegetable, and spice.

Two of my favorite chutneys are savory and spicy and super simple to make. Hari Chutney is made primarily with cilantro, mint, and hot chilies. It is fiery hot and tastes divine over any kind of tandoori meat. Coconut Chutney is served with breakfast in South India and is made primarily with coconut, tamarind, and chilies.

Saying that, I do love a tangy and slightly sweet chutney as well. My favorite "sweet" chutneys are Tomato Chutney and the ever popular Mango Chutney. Usually made with vinegar and loads of sugar (or HFCS in store bought varieties), I've always sweetened my homemade chutneys with dates instead. Guess I was working on this paleo lifestyle long before I even knew what it was!


Ingredients:
  • 8 ounces dates, pitted and finely chopped
  • 2 1/2 cups rice vinegar, unsweetened
  • 2 pounds fresh mango, peeled and cut into small pieces
  • 2/3 cup currants or raisins, unsweetened (I prefer currants)
  • 2-inch piece of ginger root, peeled and thinly sliced or grated
  • 4 cloves garlic, peeled and finely chopped
  • 1 T chili powder
  • 1 T mustard seeds

Directions:
  1. Add all ingredients into a sauce pan and mix well.
  2. Bring to a boil.
  3. Reduce heat and simmer for 45 minutes. Stir ocassionally.
  4. Serve warm.
Note: I believe chutneys are supposed to last several months if stored in an air-tight jar and refrigerated. I have to say mine never last longer than a day or two...

Thursday, October 13, 2011

Naked Momos

I'm amazed that the smell and taste of a simple dumpling can so quickly transport me to my favorite part of the world. Lounging and people watching from a rooftop cafe in Thamel, having a late lunch after the long walk up to Swayambhunath, the monkey temple. Crowded into a tiny restaurant in Shigatse, unable to avoid the generous servings of yak butter tea. Warming up with a tall glass on chhaang on a cool evening along the Annapurna circuit.

Momos are little meat and veg dumplings found in abundance at restaurants in Nepal and Tibet. They are made with a variety of minced meat spiced up onion, garlic, ginger, and cilantro. They can be steamed or fried and usually contain a little cabbage and yak cheese. And they are always served with the most tasty of dipping sauces ranging from tomato based to soy based to super spicy chile based!

The first time I made momos, nearly fifteen years ago, I had just returned home from my first adventure to the Himalayas and I was excited to show off my new cuisine ideas to friends. Total disaster! Don't get me wrong. I made a great filling, but the homemade dumpling skins sucked (I never did cook well with flour... perhaps it was a sign). Over the years and especially after subsequent trips there, my cravings returned and I tried again and again. But always stumbling over those #$%& wrappers... until now!


Serves 4

Momo Ingredients:
  • 1-2 green chilies, finely diced
  • 2-3-inch piece ginger, grated
  • 5 cloves garlic, finely minced
  • 4 green onion, finely chopped
  • 1/4 cup cilantro, finely chopped
  • 2 T coconut aminos
  • 2 T oil (I prefer sesame or coconut)
  • 1 tsp curry powder
  • 1 tsp garam masala
  • 1/2 tsp nutmeg
  • 1/2 tsp cinnamon
  • 1 1/2-2 pounds ground pork or turkey

Dipping Sauce Ingredients:
  • 1 tsp green chilies, finely diced
  • 1 tsp fresh ginger, grated
  • 1 tsp fresh garlic, finely chopped
  • 1 green onion, finely chopped
  • 1 T cilantro, finely chopped
  • 1/4 cup coconut aminos
  • 1/4 cup rice vinegar
  • 1/4 cup water
  • 1 T lemon juice

Directions:
  1. Mix all dipping sauce ingredients in a glass bowl and let sit while you prepare the momos.
  2. Mix all momo ingredients.
  3. Form meat mixture into small discs or larger patties.
  4. Heat some cooking oil in a frying pan over medium heat.
  5. Fry momos in batches, cooking 3-5 minutes on each side, or until cooked through.
  6. Serve over shredded cabbage, carrots, and cucumbers with dipping sauce.

Note: Frying an entire batch of small disc shaped momos seems to take forever. This is my favorite way to prepare momos, but since I'm usually short of time, I often opt for larger "momo patties" (fewer = quicker). A couple nights ago, I was in a particularly lazy mood when my momo craving occurred. The resulting "lazy mom momo" was received by my family just as well as any other form of momo and took about half the time! Instead of forming any shapes at all, I dumped the entire mixture into the pan and fried it up like I would taco meat. I normally prefer ground pork, but this was just as delicious with turkey!

Saturday, October 8, 2011

Laksa Lemak

Curry laksa is a spicy, coconut-curry-noodle soup from Malaysia and one our favorite weekend lunches. Lemak refers specifically to the addition of coconut milk, one of my favorite ingredients to create a rich, creamy, dish. Many traditional preparations of this dish call for tofu and mixed seafood, but I prefer a simpler style made with ground turkey, leftover roasted chicken, or even meatless. I paleo-ize the dish by using kelp noodles instead of vermicelli or rice noodles and also add cut, fresh vegetables; it's a great way to get rid of veggies in the fridge.


Serves 4

Note that many recipes exist for homemade rempah (laksa paste). I have also seen pre-packaged laksa paste, but have yet to find a paleo-friendly brand available locally. Since I always have Thai curry paste on-hand, I use that as the spice mixture for my laksa. Not authentic, but good enough.

Ingredients:
  • 1 T coconut oil
  • 1 pound ground turkey
  • 1 "scoop" red or panang curry paste (start with 2-3 tsp)
  • 1-2 cans coconut milk
  • 4 cups chicken broth (rich, homemade broth is the best)
  • 1 package kelp noodles, rinsed and drained 
  • 1-2 T fish sauce
  • 1-2 tsp lime juice
  • chilies or sambal oelek for more kick (optional)
  • 1 red or yellow bell pepper, cut into bite-sized pieces
  • 1 carrot, peeled and sliced diagonally
  • 1 cup fresh green beans, trimmed and cut, if necessary
  • 2-3 T fresh basil or cilantro, chopped (optional)

Directions:
  1. Heat oil in a wok or pan over medium-high heat.
  2. Add ground turkey and fry until cooked through. If using leftover chicken, add it to the pan and continue to the next step.
  3. Add curry paste and mix well to distribute throughout the meat.
  4. Add the coconut milk. I usually begin by adding one can of coconut milk. After everything else has been added, I test taste to see if I want to add more. I usually end up using half of the second can.
  5. Add the chicken broth, kelp noodles, fish sauce, lime juice, and chilies, if using. Bring to a boil then reduce and simmer for 5 minutes.
  6. Test taste and if necessary, adjust the flavor with more curry paste, coconut milk, fish sauce, lime juice, and/or chilies. I like to get the coconut gravy tasting "perfect" before moving the next step.
  7. Add the vegetables and simmer until they reach a desired doneness.
  8. Stir in cilantro, if using.
  9. Serve immediately.

Friday, October 7, 2011

Pork Roast

I'm not going to pretend that this recipe is so different from my Oxtail Stew. But a busy work schedule combined with lots of fresh snow in the mountains has my slow-cooker working overtime! When I arrive home from work tired and chilled, the smell of slow-cooked roast meets me at the door and instantly perks me up. Roasts are warming and filling and make fantastic leftovers for packed school lunches!


Serves 4

Ingredients:
  • 1 T coconut oil
  • 1 1/2 pounds pork (I used a shoulder roast)
  • 2 cloves garlic, peeled and chopped
  • 1 large onion, roughly chopped
  • 3 carrots, peeled and sliced
  • 1 turnip, peeled and roughly chopped
  • 1 rutabaga, peeled and roughly chopped
  • 1 parsnip, peeled and roughly chopped
  • 1 1/2 cups chicken broth
  • 4 slices bacon, chopped
  • salt, pepper, and cayenne (for a little kick)

Directions:
  1. Heat the coconut oil over medium-high heat.
  2. Brown the pork on all sides. Place it in the slow cooker.
  3. Season the pork with salt and pepper, and cayenne, if using.
  4. Fry the garlic until fragrant.
  5. Add vegetables to the pan and fry for 3-5 minutes until they begin to brown.
  6. Add just enough chicken broth so you can easily scrape up any bits from the bottom of the pan.
  7. Pour chicken broth into the slow cooker.
  8. Add vegetable mixture to the slow cooker. Do not stir.
  9. Top the slow cooked contents with chopped bacon.
  10. Secure the lid and cook for 7-8 hours on Low.

Tuesday, September 27, 2011

Oxtail Stew

I have been intrigued by ox tail for ages. I've passed it by many times in our local Asian grocery store and this week, my curiosity finally prompted me to toss a package in my basket. The girls giggled when I explained that this funny cut of meat really was the tail of a cow; followed shortly by wrinkled up noses when they realized they would soon be eating said tail. I was excited to try something new, but also perplexed with the "now what" question. I searched for recipes online and nothing quite tickled my fancy. As I sat at my computer, chilled by the sudden drop in temperatures and cool breeze blowing through the cracked window, I knew my only choice was to prepare the oxtail in a good, old-fashioned, slow-cooked stew. I relied on memories of beef stew from my childhood and began sifting through our recent CSA produce. The result was delicious! The girls were a little "grossed out" at having to discard the fat around the meat, but other than that they practically licked the bones clean.


Serves 4

Ingredients:
  • 1 T coconut oil
  • 4 oxtail pieces
  • 2 cloves garlic, peeled and chopped
  • 1 large onion, roughly chopped
  • 3 carrots, peeled and sliced
  • 2 turnips, peeled and roughly chopped
  • 2 stalks celery, chopped
  • 5 large cherry tomatoes, halved
  • 1 1/2 cups beef broth
  • 4 slices bacon, chopped
  • salt, pepper, and cayenne (for a little kick)

Directions:
  1. Heat the coconut oil over medium-high heat.
  2. Brown the oxtails on all sides. Place them in the slow cooker.
  3. Season the oxtails with salt and pepper, and cayenne, if using.
  4. Fry the garlic until fragrant.
  5. Add vegetables to the pan and fry for 3-5 minutes until they begin to brown.
  6. Add just enough beef broth so you can easily scrape up any bits from the bottom of the pan.
  7. Pour beef broth into the slow cooker.
  8. Add vegetable mixture to the slow cooker. Do not stir.
  9. Top the slow cooked contents with chopped bacon.
  10. Secure the lid and cook for 4-5 hours on High.

Sunday, September 25, 2011

Asian Lettuce Wrap

Time was ticking away. The girls were complaining of hunger pains, despite the jumbo, protein-filled breakfast they had eaten only a couple hours before. And in reality, I didn't have much time to cook something up and still call it lunch. I had been immersed in the Share a Primal Recipe thread  at Mark's Daily Apple where hundreds of mouth-watering, paleo recipes have been posted.

With a couple of Asian inspired recipes fresh in my mind (and a nearly empty fridge), here is what I cobbled together: a messy, but tasty lettuce wrap filled with sesame-cucumber salad, Asian noodle salad, and bacon!


Serves 4

Ingredients:
  • one serving of Sesame-Cucumber Salad (recipe below)
  • one serving of Asian Noodle Salad (recipe below)
  • 8 large, sturdy lettuce leaves
  • 8 slices of bacon, fried

Directions:
  1. Build wraps using the bacon and salads. Serve immediately!

Note: Other meat, such as roasted chicken could be easily substituted for the bacon.


Sesame-Cucumber Salad (inspired by Melissa at The Clothes Make the Girl)

Ingredients:
  • 1 T tahini paste
  • 1 T cashew butter, unsweetened
  • 1 T coconut aminos
  • 1 T rice vinegar, unsweetened
  • 1 tsp sesame oil
  • 1 cucumber, sliced in thin strips by hand or with a  mandolin slicer

Directions:

  1. Combine the tahini, cashew butter, coconut aminos, rice vinegar, and sesame oil. Mix until well blended.
  2. Stir in the cucumber.

Asian Noodle Salad (inspired by Melissa at The Clothes Make the Girl)

Ingredients:
  • 2 T coconut milk
  • 1 T tahini paste
  • 1 T cashew butter, unsweetened
  • 1 T lime juice
  • 1 tsp coconut aminos
  • 1/2 tsp garlic, finely chopped
  • 1/2 tsp ginger, grated
  • 1 package kelp noodles, boiled for 10 minutes and drained
  • 1 cup coleslaw mix or shredded cabbage

Directions:

  1. Combine the coconut milk, tahini, cashew butter, lime juice, coconut aminos, garlic, and ginger. Mix until well blended. The sauce with thicken quickly, but thin out when combined with the noodles.
  2. Stir in the noodles and cabbage.

Thursday, September 22, 2011

Ginger Pork

This has always been one of my favorite dishes to order at the local Thai restaurant, two blocks from our house. I had a real craving for it during a period when we were trying to save money and without a second thought, I decided I could make it just as good (if not better) in my own kitchen. And I was right! The simple ingredients create such a tangy, yummy flavor. This is one meal where leftovers are scarce!


Serves 3

Ingredients:

  • 2 T sesame oil
  • 4-5" piece of ginger, grated (watch your knuckles)
  • 5-6 T coconut aminos
  • 3/4 cup chicken broth (homemade is best!)
  • 1/2 tsp salt
  • 1 jalapeno pepper, quartered and seeded
  • 1 1/4 pounds pork loin, cut into bite-sized pieces
  • 1-2 T coconut oil
  • 1 large onion, chopped into large pieces
  • 1 red bell pepper, chopped into large pieces


Directions:
  1. In a glass bowl, combine the sesame oil, grated ginger, coconut aminos, chicken broth, salt, and jalapeno.
  2. Add the pork and marinade for at least 30 minutes.
  3. In a pan, heat the coconut oil over medium heat.
  4. Fry the onion until it turns golden brown and begins to caramelize.
  5. Add the red pepper and fry until it softens just a little.
  6. Remove the onion and peppers from the pan and set aside.
  7. Turn the heat to medium-high.
  8. Scoop the pork into the hot pan, transferring as little liquid as possible.
  9. Fry the pork until no longer pink.
  10. Add the reserved liquid and simmer until it thickens.
  11. Add the onion and peppers back into the pork mixture and simmer until the vegetables are heated.
  12. Serve hot over roasted cauliflower or cauliflower rice.
Roasted Cauliflower: Break apart or chop one head of raw cauliflower into large bite-sized pieces. Spread thinly on a cookie sheet then drizzle with olive oil and season with sea salt and pepper. Bake in the oven at 450 degrees for 20 minutes, flip and cook for another 10-20 minutes, or until browned. Serve immediately.

Cauliflower Rice: There are many ways to prepare Cauliflower Rice and this is my favorite. Finely chop or grate one head of raw cauliflower. Spread thinly on a cookie sheet then drizzle with olive oil and season with sea salt and pepper. Bake in the oven at 350 degrees for 20-30 minutes or until browned. Stir halfway through to brown the cauliflower more evenly. Serve immediately or it tends to get a bit soft.

Note: In my original recipe, I used soy sauce instead of the coconut aminos. If you use soy sauce, reduce the amount to 3-4 T or it will taste too salty. Also, I love cauliflower rice, but I am not a fan of the mess it makes in my kitchen. Lately I have been opting for the lazy person's cauliflower rice aka roasted cauliflower. It tastes the same and is a cinch to clean up!

Sunday, September 18, 2011

The Accidental Sloppy Joe

Known by many names including barbecues, yum yums, and juicy burgers (or perhaps savoury mince roll if you're a friend of Kelle's from Australia)... what is not to love about a good homemade sloppy joe? Except that I didn't start out making sloppy joe tonight. Cool temperatures have put a chill in the air and I was going to celebrate fall's arrival in Alaska with a big pot of chili. Fortunately, somewhere between pulling out all the ingredients and serving up bowls of steaming hot chili, the mixture in the pan tasted so good, I just stopped and served it as-is. Voila! The best sloppy joe I've ever cobbled together!


Serves 4, with plenty of leftovers

Ingredients:

  • 2 T coconut oil
  • 1 onion, chopped
  • 1 red bell pepper, chopped
  • 4 cloves garlic, chopped
  • 2 T fresh herbs, chopped
  • 1 T basil
  • 1 T Italian seasoning
  • 1 T cumin
  • 1 T chile powder
  • 2 bay leaves
  • 1 pound ground pork
  • 1 pound ground beef
  • 1 pound ground turkey
  • 1 can tomato paste
  • 1 can tomatoes with chiles, blended in a food processor


Directions:

  1. Heat oil over medium heat.
  2. Fry onion, bell pepper, and garlic, until onion begins to caramelize.
  3. Mix in herbs, basil, Italian seasoning, cumin, chile powder, and bay leaves.
  4. Add pork, beef, and turkey. Fry until meat is cooked through.
  5. Add tomatoes and tomato paste and mix well.
  6. Simmer for 20 minutes then serve.
Note: The chili that never happened was going to have beef broth and additional seasoning added.

...but I don't Knead That! Fennel and Pork Stuffed Mushrooms

Stupid title? Not if you start humming, "I'll do anything for love..." first. Humans need things to be healthy happy humans. We need a place to live, and yummy food, and awesome friends... we need stuff for fun like puns and homophones, but we don't knead bread. :o)

Ok, so the first inspiration for this meal came from someone else's blog, who I would love to give credit to ---but when I went looking for a link to pizza-stuffed mushrooms I could NOT find it anywhere, so then I wondered if I dreamed it... and I'm still not sure but since I couldn't find it I decided to come up with my own. Many low-carb cooks have made pizza on mushrooms so its not entirely new.

The second inspiration for this meal came from a pre-paleo favorite cookbook called "What You Knead" by Mary Ann Esposito that was given to me by my fabulous mother in law ages ago. One of my favorite recipes from that book was "Fennel and Pork Calzones." Mmmmmm mmmmmm! Now that I'm convinced that wheat is BAAAAAAAAAAAAAAAAAAAAD I don't really need this book anymore, and I'm probably a stage 4 hoarder when it comes to books, and it was a gift.... so I can't throw it out, and if you eat wheat you're probably not even reading this blog.... but if you do, and you'd like to borrow it just ask. Or, trade me for a book on "how not to write run-on sentences."

Fennel and Pork stuffed Mushrooms

12 cupcake sized mushrooms. (if you want to make use of your muffin tins, but any size will work.)
1 pound ground pork
1 onion, diced
2 large cloves garlic, diced (or smushed thru a garlic press. am I the only one who uses those?)
2 stalks celery, diced
1 carrot, diced
1 red, green, or yellow pepper (capsicum) diced (I didn't have one, but better with.)
1 Tablespoon fennel seeds (whole)
1 small can tomato paste, or 2 foil packs
S&P to taste

Pre-heat oven to 400F/200C
Brown the meat with the onion and garlic. Pour off extra fat if needed, or add a tablespoon of fat if the meat was very lean. Add the veggies and fennel seeds and cook until the veggies are to your liking.
Remove from heat and stir in the tomato paste.

Prep your mushrooms. Brush off any dirt and remove the stems and gills. Toss with olive oil and prep your pan. If they are the right size, you can stick them in an oiled muffin tin... If they are larger just place them in an oiled 9x13 inch pan, or whatever size you need. Stuff the mushrooms with the pork mixture. I ended up with about 10 that were cupcake sized, but I had luckily found perfect deep mushrooms. The large flat ones they call "field mushrooms" would work, or even "button" mushrooms... if you have leftover meat just put around the mushrooms you fill in the pan. Yes, you can use any pizza filling/sauce mix you like....Yes, if you eat cheese you can top them with cheese... (but at the end of the cooking time so it doesn't brown too much...)
Pop them in the oven for about 20 minutes....


Chicken Pancakes with Cucumber Salad


The Reality and the Beauty Shot

Twice in the past few weeks I've tried recipes off the backs of packages. The first was "Authentic" Indian Curry. (Which turned out really well - but I can't top Angie's Indian food so I won't even try.) And the second was "Chicken Pancakes with Cucumber salad" from the back of Ayam's coconut mild powder. It was pretty close to paleo as-is, and looked pretty good.

The reason for the 2 very different pictures? Well, if you've ever tried, you know how tough it is to make anything usually flour based without flour, and food blog pictures are supposed to be pretty... but when your next idea flops in the artistic photographs department, ya still gotta eat~ and this tasted really, really good.... Another egg and some careful flipping saved the day, but I wanted to post the first attempt as a reminder that the whole point of eating this way is be healthier and the reasons we share these recipes is to show that you can eat healthy and have some darn good food in the process...even if it sometimes falls apart!

Cucumber Salad (good for this recipe, or as a side for anything Thai!)

2 Cucumbers
1 Tablespoon fish sauce
1 Tablespoon tamarind puree (recipe called for plum sauce)
1 Tablespoon lime juice
2 Tablespoons chopped fresh cilantro
2 Tablespoons chopped fresh mint

Cut cucumbers in half lengthwise and scoop out seeds. Slice sideways in thin slices. (you'll end up with half-moons.) Mix with all remaining ingredients...adjusting as needed to taste. Set aside while you make the pancakes.

Chicken Pancakes (or scramble!)

400 grams leftover chicken, or turkey... finely chopped. I used a hand chopper and ended up with around 2 cups of diced meat.
1/3 cup coconut flour
1 cup coconut milk
1 heaping tablespoon chopped red chillis-- from a jar. (Know thy palate ~ adjust to taste.)
2 green onions, sliced uber thin
2 eggs

Mix all ingredients well... grease your fry pan and scoop out mix 1/3 cup at a time to form pancakes. You will be much more successful if you use a medium heat and WAIT at least 3-4 minutes before attempting to flip. Don't be shy with oil in the pan. (I used coconut oil of course, but you don't have to.) If you are in a hurry, lack patience, or have anger management issues--- go for the scramble! Which really means, try making pancakes but don't stress when you go to flip them and they completely fall apart... OR--jump right to my salvage step-- add another egg (or two,) adjust seasonings, take your time, and go for the pretty pancakes. Either way, serve the cucumber salad over or next to the pancakes... Enjoy!


Sunday, September 11, 2011

Bacon-Veg Brekkie

I am always on the lookout for quick and easy breakfast dishes. I've never been a big fan of sweet breakfasts. I've never found eggs very filling. And so I had a habit of starting my day with hot grains. Since dropping grains from my diet, breakfast is my "challenge meal". I have plenty of inspiration for lunch and dinner meals, but I find my creativity pretty lacking at 5:00 AM. A typical weekday breakfast is fruit and nut butter, smoothie, or leftovers; something I can grab on my way out the door. On the weekends, I like to relax and share a hot breakfast with the family. This dish began as simply fried tomatoes and asparagus and has now evolved into this breakfast hit that everyone in my family loves.


Serves 4

Ingredients:

  • 8 slices bacon, chopped (we prefer peppered bacon)
  • 1/4 cup green onion, chopped
  • 1 bunch asparagus, cut into 1-inch pieces
  • 1/2 cup mushrooms, cut into bite-sized pieces
  • 1 cup cherry tomatoes
  • salt and pepper, to season


Directions:

  1. Fry up bacon until nearly cooked.
  2. Add veggies and continue frying until desired tenderness is reached.
  3. Season with salt and pepper. Serve.

Saturday, September 10, 2011

Crunchy Radish Salad

This salad is so stinking easy and delicious, I can hardly believe it. Unfortunately, I can't take credit for this delicious creation as my nine-year old was in charge of salad the night this hit landed on our plates. We had just received some uber-fresh Alaskan radishes in our CSA produce box and both my girls were crinkling their noses up when I said the "R" word. I have to admit, I'm not a big fan of radishes either. The normally no-so-fresh ones available at our grocery store tend to be dry and bitter and not something I buy without a specific purpose. So when I opened up the box and saw a bunch of them staring up at me, I figured I better use them right away or they'd get pushed to the back of the fridge only to be discovered in a few weeks, when I could gladly call them bad and have an excuse to toss them. I washed them and tasted one... and had to call each member of my family into the kitchen and make them taste how good these were! Delicious!!!


Ingredients:

  • 1 bunch radishes, cut into bite-sized pieces
  • 1 granny smith apple, cut into bite-sized pieces
  • 2-3 T olive oil
  • 1-2 T balsamic vinegar
  • 1-2 T spicy coarse mustard (we used Tabasco brand)

Directions:

  1. Mix olive oil, vinegar, and mustard in a small bowl. Whisk until smooth. Taste and adjust, if necessary.
  2. Add radishes and apple to salad bowl. Pour dressing over top and mix well.

Tip: You probably won't need all the dressing.

PB (Paleo-Butter) Cup Smoothie

"Two great tastes that taste great together"... Reese's Peanut Butter Cup is considered the finest creation by H.B. Reese, a former employee of Hershey's who branched out to start his own confection company. I have to agree. I'm not a huge fan of candy, but in my pre-paleo days, this is one sweet treat that would tempt me to indulge in crappy check-out stand candy. But... just because I'm not eating sugar (or peanuts) these days, doesn't mean I don't still crave those flavors. This smoothie is my answer to that craving. And my ultimate fallback "dessert" whenever my kids talk their dad into bringing some non-paleo treat into the house!

And for the record... if you  hear my girls talking about eating "Chocolate Ice Cream" for breakfast, please don't go calling children's services on me! I love giving them the royal treatment first thing in the morning with this healthy dish!


Serves 3-4

Ingredients:
  • 2-3 bananas, cut into 5 or 6 pieces each and frozen
  • 1-2 cups unsweetened coconut milk or almond milk 
  • 1/2 cup almond butter
  • 2-3 T cocoa powder (I prefer Hershey's Special Dark Cocoa)

Directions:
  1. Add frozen bananas to the blender then top with almond butter and cocoa powder.
  2. Add milk until it nearly covers the fruit. This makes a thick, but drinkable consistency. Use less for a thicker, ice cream like dessert.
  3. Blend until smooth.
  4. Pour into cups. Drink immediately!

Smoothie Galore

Give me some frozen bananas, "milk", and fresh fruit and I will make you a smoothie that leaves you begging for more! I have always loved these cold, blended, fruity drinks, but even more so now that I've cut sugar out of my diet. In my house, we have smoothies several times a week. For breakfast, when we're running behind schedule. For lunch, on the weekend, when I don't feel like cooking. After dinner, for dessert, or any other time someone has a sweet tooth. I make them with more liquid and drink straight from the blender or make them super thick, top with nuts and seeds, and eat like gorgeous ice cream sundae. They take only minutes to make and are perfectly paleo!


Fresh Blackberry Smoothie. Is there anything better? 


Serves 4 (unless I don't feel like sharing)

Ingredients:
  • 1-2 bananas, cut into 5 or 6 pieces each and frozen
  • 1/2 cup frozen strawberries (optional)
  • 1-2 cups fresh fruit
  • 1-2 cups unsweetened coconut milk or almond milk 
  • 1/3 cup almond butter (optional, for protein)
  • flax seeds, sesame seeds, sunflower seeds, chopped nuts (optional)
Tip: Frozen bananas give smoothies the smooth, creamy texture and makes smoothies icy cold without needing ice, which can water down the fruity taste. At the same time, bananas don't add a strong flavor, so I count on the fresh fruit to do that. The smoothie pictured above was made with a pint of fresh blackberries.

Directions:
  1. Add frozen bananas to the blender then top with fresh fruit and almond butter, if using.
  2. Add milk until it nearly covers the fruit. This makes a thick, but drinkable consistency. Use less for a thicker, ice cream like dessert.
  3. Blend until smooth.
  4. Pour into cups. Top with seeds and nuts, if using. Drink immediately!

Monday, August 29, 2011

So Not Pho


Last year for Christmas my DH got me a very nice wok and a few cookbooks to go with it. They're full of nearly paleo recipes, and if they're not paleo most of them are easy to convert. I had a craving for Pho. So I found a recipe I had used before, then googled to see what else I could do with it... turns out several similar internet recipes were blasted for not being authentic. Seems the biggest complaint is that you can't make a quick pho, it needs to cook all day. Luckily I make my own beef stock, so I think I got the richness of flavor you would get from cooking all day. If you use store bought stock or broth this is still going to taste good, but read your labels. This is quick, and it's easy, and it may not be "real" Pho, but it is "real(y)" good!

So Not Pho

1 lb grass fed low fat ground beef
1 12oz package of kelp noodles, rinsed
1.2 liters (2 pints) home-made beef stock, or the best you can buy
3 whole star anise
1/2 teaspoon ground cloves
1/2 teaspoon ground cinnamon
1 Tablespoon fish sauce
1 Tablespoon (or less) ground red chilli paste.
(I used the kind that comes in a jar like minced garlic, but fresh or dried to your taste would work.)
S&P to taste

Marinade:
1 Tablespoon coconut aminos
1 Tablespoon rice wine
3 teaspoons sesame oil
1/2 Tablespoon fresh grated ginger
1 Tablespoon ground red chilli (1 T in both the soup and the marinade made a nice heat if you like spicy food...adjust down if you do not!)

Garnish:

Chopped spring onions and/or mint and/or cilantro and/or basil
(I used mint and cilantro and will probably do the same from now on.)

What to do:

Mix all marinade ingredients and mix with the ground beef. Marinate for at least 20 mins. in the refrigerator.

Bring stock to a simmer in a wok or large pot.
Add star anise, cloves, & cinnamon and simmer about 3 mins.
Add the beef and bring back to a simmer, cook 1 minute breaking up any clumps.
Add the fish sauce, chilli sauce, S&P and simmer a few more minutes.
Add the kelp noodles and stir them in for a few minutes.
Remove the star anise.

Garnish with the chopped herbs and serve in large bowls.

(if you are more gluten-free than paleo, soak 6-8 oz of dried rice noodles for about 20 minutes in hot water, rinse and set aside... stir in at the end instead of, or in addition to the kelp noodles.)

Tuesday, August 16, 2011

Osso Bucco

Twice in the past week and a half I've made Osso Bucco. Traditionally made with lamb, I use beef. Osso Bucco is simply the thigh cut cross-wise, and since it has the bone left in it should be no surprise that the translation is simply, "bone with a hole." Its a cheaper cut, with lots of connective tissues, so it needs longer cooking. A few hours in the oven, or perfect for the slow cooker. And it comes with a bonus - Marrow! I have made this recipe with all the ingredients, and also lacking several... (and once I was out of thyme so I used tarragon - loved it.) Change it up as needed... and enjoy!

Slow Cooked Osso Bucco

4-6 pieces of osso bucco
few Tablespoons olive oil or oil of choice
2 onions, diced
2 cloves garlic, finely minced
2 carrots, sliced thick or diced
2 sticks celery, cut same as carrots
1/2 cup (or more) good dry wine
1 1/2 cups beef stock
2-3 Tablespoons tomato paste
1 can diced tomatoes (optional, but you want enough liquid to just cover the meat so use more broth or wine if needed)
1 teaspoon dried thyme (or tarragon, not both)
a few bay leaves

Get slow cooker ready.

Brown osso bucco on each side in oil, lay in slow cooker.

Saute garlic, onions, carrots, celery until onions are nicely browned and put on top of meat in slow cooker.

Mix wine, broth, tomato paste, spices, and canned tomatoes (if using) well and pour over meat.

Liquid should come JUST to the top of the meat... or cover barely.

Cook on low for at least 5 and up to 8 hours. Check once or twice during cooking if you're around and stir or spoon liquid over the meat.

Serve with salad, any paleo-friendly veggies, or just plain... So Delicious! I even got all 3 of my girls to eat the marrow.

Thursday, August 4, 2011

Cool Tahini "Pasta"

Once upon a time, long long ago...(Like, mid-90's!) I copied two recipes onto a legal pad from one of Angie's cookbooks... Recipe # 2 I have never made, but the first one, "Cool Tahini Pasta" is a different story! Its been awhile since I've made it... pasta-schmasta... but while visiting with Angie recently she was telling me about coconut aminos and kelp noodles. Coconut aminos are a great substitute for soy sauce, and kelp noodles sounded like a cross between glass noodles and mung bean sprouts. I get back to Perth excited to try them both... and nada! Add 2 more things to the list of "Items you can't find in Western Australia." So I ordered some, and they came today. Lots of ideas came to mind, but this recipe allowed me to try both, and it turned out so good it was almost gone before it got photographed.

Cool Tahini Pasta

1/4 cup rice wine vinegar
2 Tablespoons water
3 T coconut aminos
1 Tablespoon tahini
1 cloved garlic, pressed or diced beyond teeny-tiny
1 & 1/2 teaspoon fresh grated ginger

Mix all the above ingredients well. Add a 12oz bag of rinsed and drained kelp noodles.

Add:
2-3 small green onions, sliced thin
3 T fresh cilantro leaves

Stir and serve immediately. Serves 3 (If you let it set, the noodles loose their "pop." Which I personally like, but it still tastes good.)

Wednesday, August 3, 2011

Kürbispastete (Pumpkin and Meat Pie)


I love pumpkin. And I love beef. Google those two ingredients and you'll find enough recipes to show lots of people like them together. And why not? Yum + yum = double yum, right? From Kaddo Bowrani (Afghani pumpkin) to Pumpkin Chili or Pumpkin sloppy joes... there are a lot of things to try. (My next experiment will be Sarah's meaty pumpkin soufflé in her book, "Everyday Paleo.") But my favorite pumpkin-beef recipe ever is kürbispastete. Kürbispastete is just German for deep dish pumpkin and meat pie. And the way I found this recipe was long ago, when Angie and I and several friends used to get together for dinner parties, we would always pick a theme. My husband swears that the best dinner we ever had was the night our dinner group picked german food, and I have to agree. For the occasion I bought a german cookbook off the bargain table at Border's. And paging thru that book is where I came across kürbispastete. Its not paleo on its own, but its not far off. First of all, it is a pie (crust) ...and the original recipe calls for grated cheese, cream, and butter... but just drop those 4 things and you still have a yummy dish. I frequently make my paleo version without a crust. I usually skip things like crusts instead of paloe-tizing them, but tonight I went for it.

Kürbispastete- Paleotized!

Crust:
1 cup almonds
1/2 cup coconut flour
6 tablespoons coconut oil (solid)
1/2 to 1 teaspoon salt
3 T icewater

Put almonds and coconut flour into food processor. Process until corn-mealy looking, but not so long that the almonds turn to butter. Add remaining ingredients. (3 T water is a good start-- no more than 4) and pulse until it all comes together in a ball... (almost) ... scrape out and put in a bowl or ziploc and put in the fridge until ready to use. Mine was still pretty crumbly but I didn't expect to be rolling out perfect dough circles so that is ok! Dump most of it in a deep pie pan and smush it into the bottom and up the sides. Save a little to crumble over the top.

Filling:
2 lbs. pumpkin
2 Tablespoons vinegar
1 & 1/2 pounds ground meat. (I use beef, but pork or any other would work too.)
S&P
Basil (I usually use dried, but this time used about 1/3 cup chopped fresh - highly recommend fresh!)
1/4 cup of thick coconut cream scooped off the top of a can that has NOT been shaken. (Save the rest of the can for something else. Actually, I got about 1/2 cup of cream...could use more, but its pretty rich, so I think 1/4 cup was plenty...ALSO, this dish is still good without it, or use dairy if you like.)

Peel and cube the pumpkin and put in a saucepan. Cover it with water and the vinegar and cook until tender, then drain well. Alternate layers of pumpkin and meat, seasoning each layer. (Yes, the meat is still raw at this point... crumble it into chunks as small as you can.) Dot with coconut cream and sprinkle any remaining crust crumbs over the top. Bake @ 350F for about an hour. (I covered it with foil for about 45 mins to keep it from over browning.)

Enjoy!

Sunday, July 31, 2011

Most Awesome Meatloaf


I couldn't decide what to call this... it is hands down by far the best meatloaf ever...and I have tried a LOT. Just about every paleo blogger has their own version...and I've made several of them. They are all good - so what makes this the best? Well, a few things. First - what to use to keep it moist, and take the place of breadcrumbs? Most people use almond or some other nut meal. I like almond meal fine in meatloaf and meatballs, but frankly I don't need the calories. Second - basic meatloaf is well, boring... I've been adding my other secret ingredient in increasing amounts so not to overwhelm the loaf. Totally got it perfect tonight... moist, rich, flavorful... So good, we were all fighting over seconds. So, what are these two fantastic additions? Read on:

My super-awesome, totally-yummy, "keep your hands off my seconds" nut-free Meatloaf!

1 zucchini, grated
1 teaspoon salt

2 lbs grass-fed ground beef
1 diced onion
2-4 minced garlic cloves
1/2 cup fresh herbs - basil, oregano, marjoram, or a mix.
1 teaspoon dried herbs. (oregano or any italian mix)
2 eggs
3 Tablespoons tomato paste (1 foil pack)
1 can diced tomatoes (optional)

4-6 oz marinated liver, grated, or diced very fine if not frozen
(I mentioned this in my last recipe- liver is worlds upon worlds better if you marinate it in lemon juice for at least 30 minutes & up to a day. I cook some of it on its own, and freeze the rest in approximately 5 oz chunks to use later in meatballs or meatloaf.)

What to do:

First, grate the zucchini and salt it. Use your hands to mix the salt in well, then leave it while you get everything else ready. Grate the liver into a separate bowl. Be careful if its frozen that you don't get frost bite on your hands. (trust me!)

Scoop the zucchini up in both hands and squeeeeeeeeze. Squeeze some more. I dump that onto a doubled paper towel and gently squeeze again to get all the water out. Don't skip this, or you won't have a loaf so much as a soup. It starts out as about 2 cups grated zucchini, and ends up about a cup after all the water is out.

Get your slow-cooker ready with a light swipe of oil.

Mix all the ingredients by hand thoroughly and form into a loaf to fit your slow cooker. I get it close, drop it in, and then push the sides in all around to make it a little taller than I want. It will settle a little while cooking.

Sometimes I add a can of chopped tomato over the top. Its not really necessary, but it makes a great sauce that can be served over veggies.

Cook 5-7 hours on low... plus or minus depending on when you want dinner and how your cooker cooks. I usually start on high for an hour and then turn it down for another 4-6.

Serve with veggies, roasted root veggies, or mashed rutabagas...


Friday, July 29, 2011

Smothered Liver and Roasted Cauliflower


How many of you used to have to eat liver as a kid, and the ONLY way you could choke it down was to smother it with ketchup? In my house, we couldn't leave the table until the plate was clean...even if it was mom's overcooked (sorry, mom!) liver. Well, now I'm older (ouch!) and wiser (yea!) and have figured out that liver is not only GREAT for you, but that with a trick or two, can be pretty yummy as well! My pre-cooking google search (I do this almost every night) revealed that several liver recipes called for thyme... hmmm... I like it plain, but figured so many in agreement must be on to something, so I sprinkled it on some cauliflower with some garlic cloves and oil to roast as a side. As always, substitute as needed, posts are just a guide. Bon appetite!

Smother Liver with Roasted Cauliflower:

Roasted Cauliflower with Thyme

Pre-heat over to 200C or close to 400F. Chop florets from 1/2 a cauliflower and toss with a few peeled garlic cloves, oil of choice, and dried or fresh thyme and S&P to taste. Roast in oven for 30-40 minutes, stirring once or twice.

Smothered Liver


TIP #1. THE most important step for liver neophytes. MARINATE THE LIVER IN LEMON JUICE! It makes a difference...really! If you think you hate liver but want to try to eat it because you KNOW you SHOULD...try this tip. 24 hours is best, so plan ahead... even 30 minutes makes a difference....

TIP #2. Don't overcook! I guess if you have a true aversion to pink and feel compulsive about cooking to "well done," then go for it... but I cannot stress how much better this dish is when only cooked to medium...or medium rare if you dare.

1 large lemon
Liver - a pound or close to it to serve 2 - diced to 1/2 - 3/4 inch cubes
oil of choice
1 onion - diced
1/2 cup diced mushrooms (optional)
1/2 cup beef stock
1 foil pack tomato paste (2-3 T)

Squeeze lemon juice over liver an marinate at least 30 minutes, up to a day. 24 hours is optimal if you have the time.

While cauliflower is roasting:
Dice onion fine and liver to bite size. Dice mushrooms if using and heat oil in pan. (beef tallow is a plus.)
Saute onions and mushrooms until onion is softened and crisping on the edges. You want it to be almost done before you go on.
Toss in diced liver and sear for a minute. After a minute, give a quick stir and flip any pieces that didn't flip on their own. Sear for 1 more minute. At this point, either stir-fry to desired doneness...or if you have no aversions to nightshades, stir in a few tablespoons of tomato paste and 1/2 cup beef stock. Continue to stir-fry until as done as you need it to be. Medium is better than you'd think - especially if you think you don't like liver, but cooking it longer won't hurt anything either.

Serve hot with cauliflower. So yummy - the DH and kiddos all ate some without complaining. (Even I'm surprised!)


Wednesday, July 27, 2011

What to cook for picky kids - Hamburger cut-outs


Usually I hate cooking multiple meals for the family and avoid it as much as I can, but the reality is: DH and I love spicy food but the kiddos are 5 (picky,) 5 (picky,) and 7 (picky) and tend to want meals a little more simple. Luckily, they have taken to the standard veggie plate that starts almost every meal, and tonight's cooking lended itself to "spicy for us" and "simple for them" quite easily. For us? A rockin' penang curry made with ground grass-fed beef and whatever veggies I could find. I keep lime leaves in the freezer so I always have those on hand... See Angie's fabulous post for thai curry basics!
After I grabbed the ground beef I needed for the curry, I put the rest in a large zip-lock bag and pressed it flat (around 1/2 inch thick or less) and popped it in the freezer. By the time the curry was simmering away, the rest of the ground beef was firm, the veggies were almost gone, and I grabbed cookie-cutters and cut out some hearts and initials for the girls.
Difficult? No! Recipe needed? No! But if any of you have picky kids like I do, or are worried about what to feed them, sometimes all it takes is a little creativity. Besides, you need to find a use for all the cookie cutters, ice-cream scoops, and cupcake tins that you really don't need anymore!

Sunday, July 24, 2011

Jet-Lag Special

I've gotten really good with short-cuts while cooking since having kids, but this morning I woke up at 3:30 am so I had a little extra time to do things right. Today's cooking goal? To make beef stock. Usually I just use raw soup bones I get from the grass-fed beef vendor at our market, and whatever veggies I can find in the fridge. This morning I decided to roast the bones first. It really makes for a good stock, and as a bonus-if you line your tray with foil and turn up the edges, you can save all the awesome fat that renders from the marrow. Most of that I saved for future use, but I took a few teaspoons of it, fried a julienned purple carrot in it, and ended up with a super yummy "hash." Add a fried egg on top, and viola!
The picture didn't turn out as well as I would have liked, but it sure was delish. I would absolutely add some onion next time, but I haven't re-stocked the refrigerator yet and didn't have any.


Purple Carrot Hash

1 carrot per person
(I know this will be even better next time with onion)
marrow fat! or whatever fat you like
S&P to taste
1 or 2 eggs per person

Julienne, slice, or dice your veggies
Fry in the marrow or other fat until soft and starting to crisp up.
Move hash to plates and use the same pan to fry eggs to your liking.
Serve egg over the hash with S&P. Who needs potatoes anyway?


Mixed Seafood Red Curry

On the tail of my previous post about making a perfect Thai Coconut Curry, I thought I'd give an example of the deliciousness you can create with a little imagination. This rich red curry is so gorgeous, I serve it plain and always want to eat the whole batch in a single sitting.


Ingredients:
  • 1 T coconut oil
  • 2 T red curry paste 
  • 1 can coconut milk
  • kaffir lime leaves (optional)
  • 1 Japanese eggplant, cut into chunks
  • 1 cup fresh green beans, end trimmed and cut in half
  • 1/2 red bell pepper, cut into chunks
  • 2 heads baby bok choy, cut into chunks
  • 1/2 cup baby tomatoes, whole
  • 1/4 pound salmon, cut into chunks
  • 3 sea scallops, cut in half
  • 3 large prawns, peeled and deveined
  • 1 1/2 tsp fish sauce
  • 3 tsp lime juice
  • 2-3 cilantro, chopped

Directions:
  1. Heat oil in a wok or pan over medium-high heat.
  2. Add curry paste and fry for 2-3 minutes. The paste will become fragrant and may begin popping and sizzling.
  3. Add about 1/3 can of coconut milk and kaffir limes leaves (if using) and mix well with the curry paste and oil. Fry for 5-10 minutes or until an oily sheen appears the coconut milks begins to separate.
  4. Add the vegetables and fry 1-2 minutes.
  5. Add the seafood and fry 1-2 minutes.
  6. Add the remaining 2/3 can of coconut milk along with the fish sauce and lime juice. Cook 5 minutes, or until the seafood is cooked through and the vegetables are at a desired doneness.
  7. Taste and adjust. Too mild? Add more curry paste. Too bland? Add more fish sauce and/or lime juice. Too thick? Add a little water. Continue adjusting until you reach that taste of ultimate yumminess.
  8. Stir in cilantro and serve immediately.

A Perfect Thai Coconut Curry

Thai Curry is probably the most frequently cooked dish in my house. I could make a different curry each night of the week and would never get tired of the creamy deliciousness! The basic ingredients of a Thai Curry are curry paste, coconut milk, and protein and/or veggies. From there, you can mix and match to create an endless variety of gorgeous meals.


Here's an overview of the different types of Thai curries (from mild to spicy) and the most common combinations:
  • Yellow Curry (Kaeng Kari). This is generally a mild Thai curry and turmeric in the paste results in a bright yellow color. Yellow curry is most often made with chicken, onion, and potatoes. For a paleo version of this basic recipe, I substitute rutabaga or other paleo-friendly root vegetables for the potatoes. I also like making a yellow curry with shrimp and baby sweet tomatoes.
  • Massaman Curry (Kaeng Matsaman). This Thai curry is Muslim in origin and the paste contains "warming" spices like cardamom, cinnamon, star anise, cloves, and nutmeg. Massaman curry is a great winter curry and is most often made with beef, nuts, onion, and potatoes. I generally make massaman curry with beef, onion, and cashews then serve it over mixed raw cut veggies although again, paleo-friendly root vegetables can be substituted for the potatoes.
  • Panang Curry (Panaeng). This Thai curry is one of my favorites and can range from quite mild to fiery hot. Panang curry paste has similar ingredients to red curry paste (and in some cases, recipes even call for red curry paste), but the preparation of a panang curry makes it distinct. While the other curries tend to be served in a bowl with a creamy coconut gravy, panang is a "dry" curry made it less coconut milk and served on a plate. Panang curry is often made with beef or chicken and peanuts. I like substituting cashews for the peanuts and I think pretty much any veggie tastes great in a panang curry.
  • Red Curry (Kaeng Phet). This is a spicier Thai curry made with red chilies and is usually prepared with chicken or seafood and bamboo shoots. I like adding red bell peppers, carrots, and broccoli although like the panang, I will use any veggie in a red curry.
  • Green Curry (Kaeng Khiao Wan). This is one of the spiciest Thai curries made with green chilies and I believe the most common in Thailand. It is made with a variety of meats but almost always contains eggplant. In addition to eggplant, I like making it with chicken and adding other green vegatables like fresh green beans, zucchini, baby bok choy and broccoli.

Note that I do not make my own curry paste. There are plenty of recipes for each type of curry paste, but most pre-packaged pastes are paleo-friendly (but read the ingredients to be sure) and I've never been quite able to attain the same tastes with my homemade curry paste. So I take the easy road here.

Ingredients:
  • 1 T coconut oil
  • 1 "scoop" curry paste of choice (start with 1-2 tsp - you can add more later)
  • 1 can coconut milk
  • kaffir lime leaves (optional)
  • chilies or sambal oelek for more kick (optional)
  • 2-3 cups vegetable(s) of choice, chopped
  • 1 pound meat of choice, cut into 2-inch chunks
  • 1-2 tsp fish sauce
  • 2-4 tsp lime juice
  • 2-3 T fresh basil or cilantro, chopped (optional)
  • cashews (optional)

Directions:
  1. Heat oil in a wok or pan over medium-high heat.
  2. Add curry paste and fry for 2-3 minutes. The paste will become fragrant and may begin popping and sizzling.
  3. Add about 1/3 can of coconut milk and kaffir limes leaves (if using) and mix well with the curry paste and oil. Fry for 5-10 minutes or until an oily sheen appears the coconut milks begins to separate.
  4. Add the vegetables and fry 1-2 minutes.
  5. Add the meat and fry 1-2 minutes.
  6. Add the remaining 2/3 can of coconut milk along with the fish sauce and lime juice. Cook 5 minutes, or until the meat is cooked through and the vegetables are at a desired doneness.
  7. Taste and adjust. Too mild? Add more curry paste. Too bland? Add more fish sauce and/or lime juice. Too thick? Add a little water. Continue adjusting until you reach that taste of ultimate yumminess.
  8. Stir in basil or cilantro and cashews (if using).
  9. Serve immediately over Cauliflower Rice, Spaghetti Squash, or a mix of chopped raw vegetables.

Saturday, July 23, 2011

Pork Vindaloo and Cauliflower Rice

Vindaloo is typically known as a fiery hot Indian curry. It was first introduced to the Goan region by the Portuguese as a meat stew flavored with wine and garlic. The Indians created their own version by switching out the wine for vinegar and adding plenty of spice from red chillies. A spicy Pork Vindaloo is one of the hottest dishes served in most Indian restaurants but if you really want to set yourself on fire, keep your eyes open for the even spicier Tindaloo. This is a mild and creamy Vindaloo, but feel free to adjust the heat with by throwing in some extra chillies!


Pork Vindaloo Ingredients:
  • 3 T coconut oil
  • 6 garlic cloves
  • 1 onion, cut into chunks
  • 3 T grainy mustard
  • 2 tsp ground cumin
  • 2 tsp turmeric (or curry powder)
  • 1/2 to 2 tsp cayenne powder
  • 2 T red wine vinegar
  • 1 1/2 pounds pork, cubed
  • 1 can coconut milk

Pork Vindaloo Directions:
  1. Heat oil over medium-high heat.  Add whole garlic cloves and fry until lightly browned.  (If not using a pressure cooker, I crush the garlic).
  2. Add onions and fry until lightly browned, stirring as needed.
  3. Make a paste by mixing the mustard, cumin, turmeric, cayenne, and vinegar.  Stir in to the onions and garlic and mix well.
  4. Stir in the meat and coconut milk.
  5. Cover and bring to high pressure in the cooker.  Reduce heat and cook with pressure for 20 minutes.  If using a normal stovepot pan, simmer until the meat is cooked through, approximately 60 minutes.
  6. Serve immediately over Cauliflower Rice or raw chopped veggies.

Cauliflower Rice: There are many ways to prepare Cauliflower Rice and this is my favorite. Finely chop or grate one head of raw cauliflower. Spread thinly on a cookie sheet then drizzle with olive oil and season with sea salt and pepper. Bake in the oven at 350 degrees for 20-30 minutes or until browned. Stir halfway through to brown the cauliflower more evenly. Serve immediately or it tends to get a bit soft.

Saturday, July 16, 2011

Polish Sałatka (Polish Potato Salad - Paleo Style)

Another day another cook-out. I used to love potato salad, so imagine my delight when searching polish food recipes to stumble across "sałatka." Its potato salad, and so much more...so of course to make it paleo I made it so much less (-potatoes, sugar, and non-paleo dressings) and a new fav was born!

Polish Sałatka (the "ł" is like our "w." - but you can just call it yummy!)

1 large rutabega or a few small ones
1 parsnip
1 celery root

1 turnip
2 carrots

2-3 celery stalks
2-3 polish dill pickles
(any other veggie you have on hand and like(d) in potato salad - green or red peppers?)

2 hard boiled eggs, cut into bite-sized pieces
Mayo - probably homemade or any that is actually paleo
mustard
S&P

What to do??

Peel and cut all veggies to bite size. (I diced the non-boiled veggies smaller - my personal preference.) The ones in the first group (rutabegas, parsnips, celery root) you want to boil until tender.

The veggies in the second group (carrot, turnip) you could boil, but I hate mushy turnips, so I quickly blanched these.

The veggies in the last group (celery, pickles) leave raw.

Dump it all in a big bowl, and dress with as much paleo mayo you like. Add a little mustard and S&P to taste, and voila! A paleo potato salad everyone will love!

Monday, July 11, 2011

Power outage!


I was getting really REALLY tired of chicken... SO, I was paging thru my new cookbook ("Everyday PALEO" by Sarah Fragoso) that Angie gave me (thanks again, Ange!) and stumbled across Salmon Cakes with Ginger Mayo. I did a double take, and then remembered.... I've made those. And better yet, the kids loved those! Believe me, I had my doubts. Canned salmon? I like salmon, but canned salmon? Bleh-it stinks! I'm not sure why I ever tried them in the first place, but I am so SO glad I did. (I was probably being lazy and trying to avoid a trip to the store.) Now here comes the fun part... I was at my mom's house and a storm was coming. I made the mayo first, and that was good, because within seconds after finishing it the power went out. I was literally scooping the mayo out of the blender in the dark. Luckily, mom has a gas stove top. I feel strongly that gas is better for cooking than electric---never more so than when the power is OUT. Kinda modern-day paleo to be cooking by lamplight!

Now, this is Sarah's recipe, so I won't post it again. (click the link here or above to get her recipe.) I will say, Don't worry if you have to substitute. Mom didn't have dried dill, but did have ancient dill seeds so I just chopped them a little to release some flavor. Sarah didn't mention how big the cans of salmon were, so I assumed small and used one big 14.5 ounce can. I also totally forgot to put mustard in the mayo. Still great. To make up for that-the green onions were fresh from dad's garden! The only bad thing about these salmon cakes is I forgot the leftovers at mom's house and can't have one right now!

Sunday, July 10, 2011

Sassy Green Devils


This recipe is one you've seen all over, just search "paleo" + "deviled eggs." Yes, you can make regular deviled eggs paleo if you make your own mayo, but I had neither the time or the equipment. I also have made these before and think I actually prefer them to the old version. There are many, many versions of this recipe all over the internet, but I'm giving credit to and linking to this site because Jessica called them green devils, which I just like... and I love her recipe exactly as is. BUT, I also like more of a kick, so I added lime juice the second time I made them, and then a chopped up jalapeno the third... I think I now have the best possible combination....and they are fantastic! Enjoy!

Sassy Green Devils
  • 6 hard boiled eggs
  • 1 avocado
  • handful cilantro, chopped
  • juice of one lime
  • 1 jalapeno, diced
  • S&P
Cut eggs in half, remove yolks, set whites aside. Take the yolks and smush them up with the remaining ingredients. Scoop the filling back into the egg white halves. You can garnish with paprika or cayenne if you like...but while a regular deviled egg really needs the sprinkle of red to spruce it up, the little green guys are fine on their own.